
Information included in the article
- Cloud storage optimization for virtual instances
- Create cloud virtual instance of computers
- Create cloud virtual instance of VMWare servers
- Virtualizing a machine in the cloud
Cloud storage optimization for virtual instances
The IDrive BMR cloud infrastructure employs storage devices with NVMe accelerated caching and computing resources, delivering optimized storage and performance of the virtual instances.
Create cloud virtual instance of computers
To create a cloud virtual instance of your computer,
- Connect to the IDrive BMR device interface.
- On the Cloud Virtualization tab, click the Build Virtual Instance button.
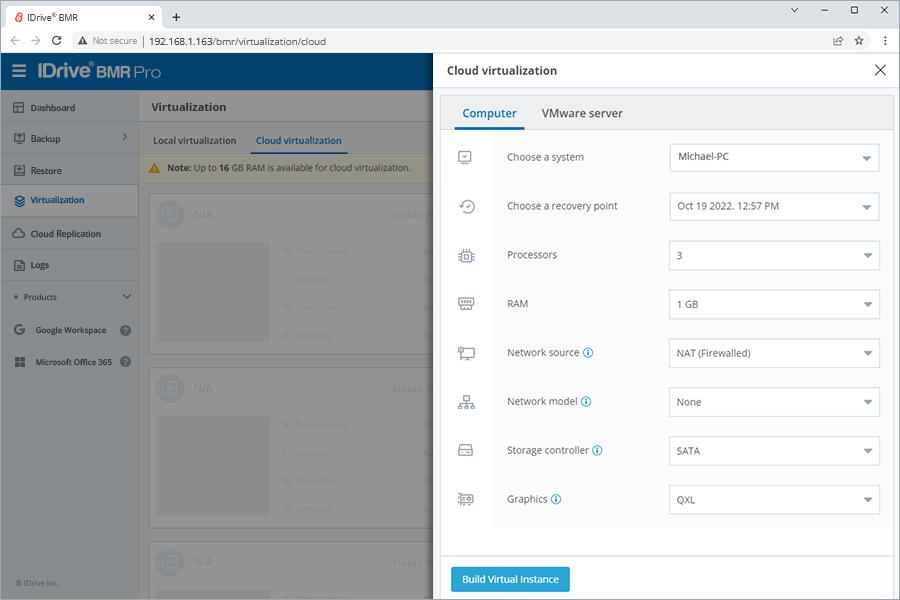
A new popup will appear. - On the Computer tab, select the required computer from the Choose a system dropdown.
- Choose a recovery point.
- Select the number of processors for the virtual instance.
- Allocate required memory for the virtual instance in the RAM field, taking into account the memory available for cloud virtualization.
- Select a network source.
- Next, select the appropriate network model.
- Choose the required storage controller for the virtual instance. SATA is recommended.
- Select a graphics option from the dropdown.
- Click Build Virtual Machine.
Once this is completed, your virtual instance is built. You can now connect to it and access the backed-up data.
Note: When a machine with dynamic disks is virtualized, the created virtual instance will have basic disks with randomly assigned drive letters. You may have to sign in to the VM and change the drive letter associations as necessary.
To connect to a virtual instance,
- Navigate the virtual instance and click the Copy VNC Password button.
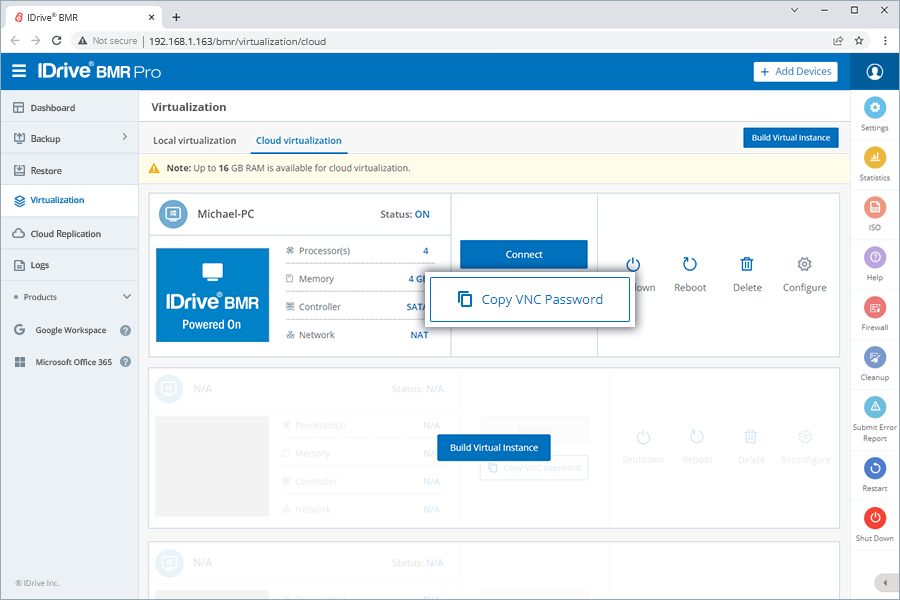
- Click Connect against the virtual instance.
- In the new window that appears, paste the password. Click Send Password. Remote connection to the virtual instance will be established.
Create cloud virtual instance of VMware servers
To create a cloud virtual instance of your VMware server,
- Connect to the IDrive BMR device interface. If you are on an external network, refer to How do I create a cloud virtual instance from the IDrive BMR web console?
- On the Cloud Virtualization tab, click the Build Virtual Instance button.
- A new popup appears.
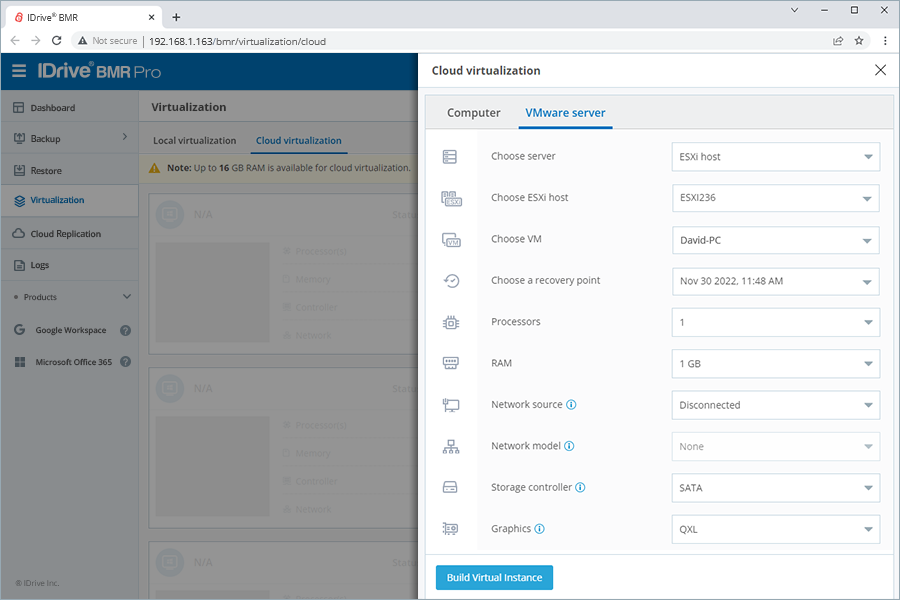
- In the VMware tab, choose the required server from the Choose server dropdown.
- Select the vCenter server and/or ESXi host from respective dropdowns.
- Select a VM from the Choose VM list.
- Choose a recovery point that will be used to create the virtual instance.
- Assign the number of processors for the virtual instance from the Processors dropdown list.
- Allocate required memory for the virtual instance in the RAM field, taking into account the space available for cloud virtualization.
- Select a network source.
- Next, select the appropriate network model.
- Choose the required storage controller for the virtual instance. LsiLogicSAS is recommended.
- Select a graphics option from the dropdown.
- Click Build Virtual instance.
Once this is completed, your virtual instance is built. You can now connect to it and access the data.
Note: Virtualization is not supported if the operating system disk is excluded from the backup.
To connect to a virtual instance,
- Navigate the virtual instance and click the Copy VNC Password button.
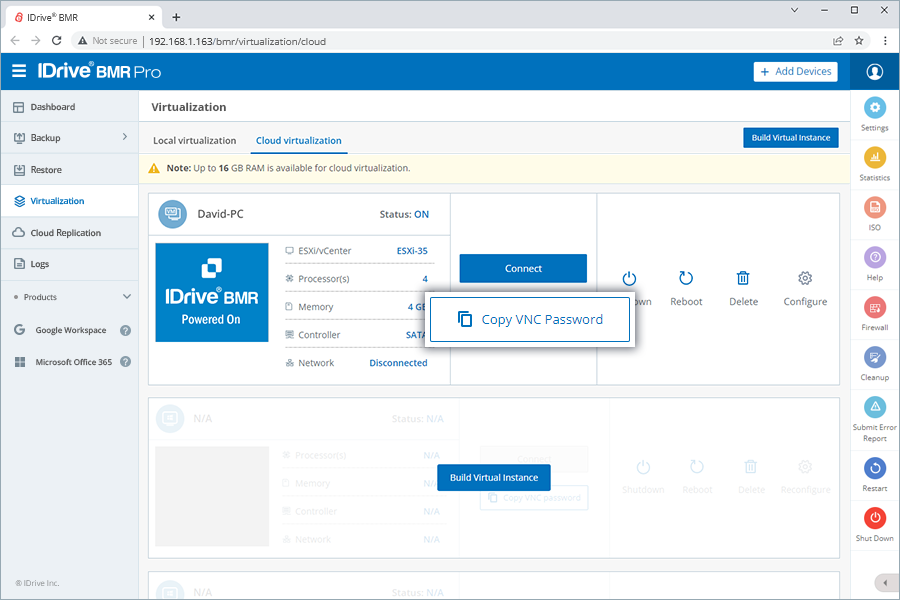
- Click Connect against the virtual instance.
- In the new window that appears, paste the password. Click Send Password. Remote connection to the virtual instance will be established.
Virtualizing a machine on the cloud
The following points must be taken into consideration while virtualizing a machine in the cloud,
- The virtual instances hosted in the IDrive cloud have only outbound internet access.
- The data changes made to the cloud virtual instance cannot be restored back to the production machine.
- The access to the virtual instance is provided over an encrypted VNC web-client based application.
- The virtual instances hosted in the cloud are automatically powered off after 14 days. However, it remains mounted and the data is preserved. To continue using the virtual instance, you will need to power it back on when needed.
I received an error message when I tried to virtualize a backup of a Dell server with UEFI firmware. How shall I proceed?
If you received the above error message when virtualizing a backup of a Dell server with UEFI firmware, follow these steps to manually select the firmware image and boot the virtual instance:
- As mentioned on the screen, press X to exit and go to the virtual instance’s BIOS.
- Select Boot Maintenance Manager and select the Enter key.
- Select Boot From File and select the Enter key.
- Select the first entry that starts with ESP,.. and select the Enter key.
- Navigate the folder path EFI > Microsoft > Boot and select bootmgfw.efi.
- The VM will boot into the OS.