
Information included in the article
Change network settings
During the initial sign-in, by default, the device will be configured to DHCP mode. You can change the default settings from the Settings tab.
To change network settings,
- Connect to the IDrive BMR device interface.
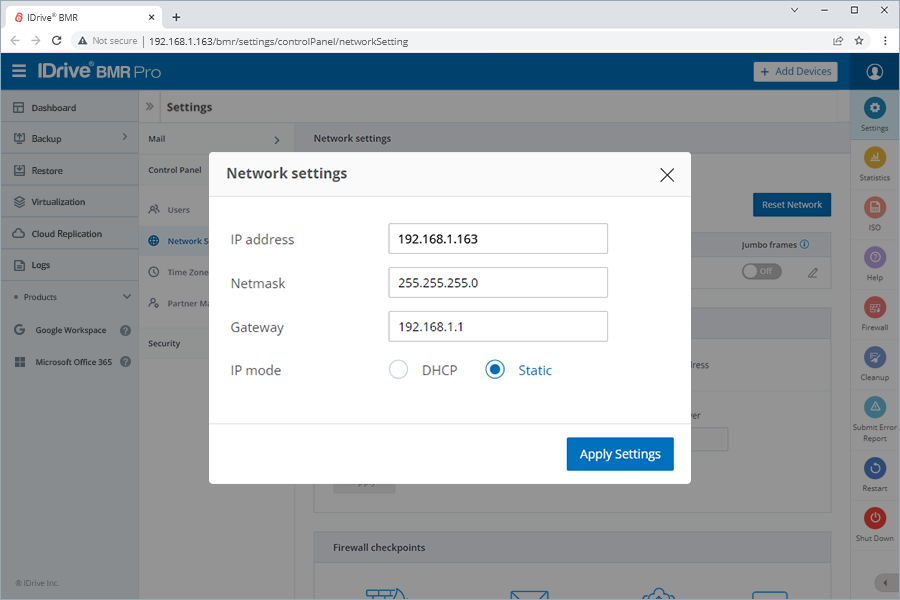
- Go to Settings > Control Panel > Network Settings.
- Click the
 against the required ethernet port entry.
 - Select IP Mode as Static and provide the required information such as IP address, Netmask, and Gateway in the respective fields.
- Click Apply Settings.
Change DNS settings
To change DNS settings,
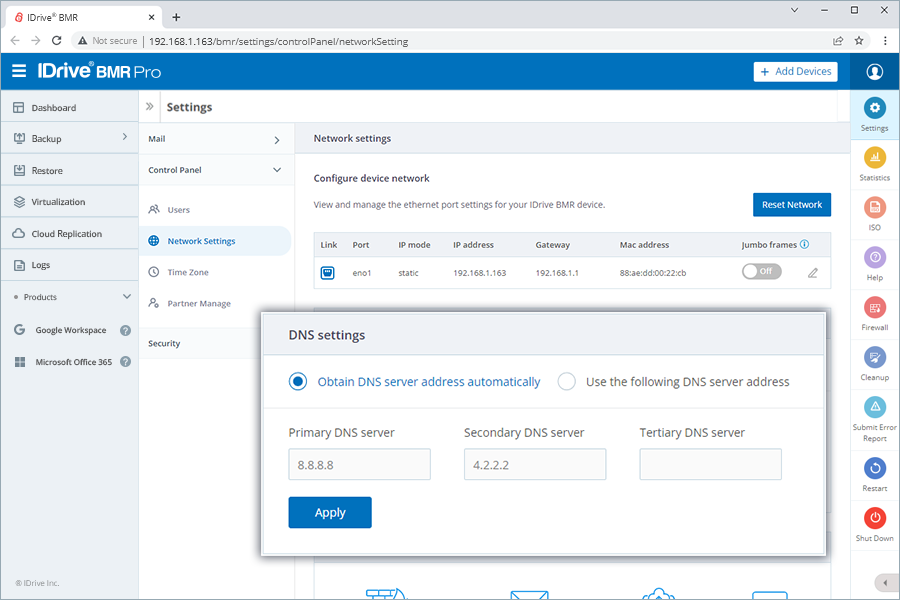
- Go to Settings > Control Panel > Network Settings > DNS settings.
- Select Use the following DNS server address radio button.
- Provide primary, secondary, and tertiary DNS server addresses in the respective fields and click Apply.
Reset network settings
Click Settings > Network Settings > Reset Network to reset the network settings.
The following actions take place when you reset the network settings:
- Both the network interfaces on this device will be set to DHCP mode.
- The device will reboot to apply the changes. Ensure no backups are in progress at this time.
- After reboot, the device will try to obtain DHCP-provided IP from your network.
Firewall checkpoints
Firewall checkpoint is a function within the IDrive BMR device that helps you check firewall restrictions, if any. Network restrictions on services such as email delivery, cloud replication, and so on are identified through this function.
To check these settings, click Firewall on the RHS menu.
Alternatively, navigate to Settings > Control Panel > Network Settings > Firewall checkpoints and click Check Now.